
Easter Bonnet Day at school took a different turn as my daughter did not want to wear a hat but a flower crown.
I cheated my way with this flower crown as I’ve been “woman down” (if you read my Instagram) but this mom had to come up with something quick and easy.
So you can use our Easter Bunny Template to make your Easter crown for your children. You decide what material and headband you’d like to use.
STEP 1:USE A TEMPLATE
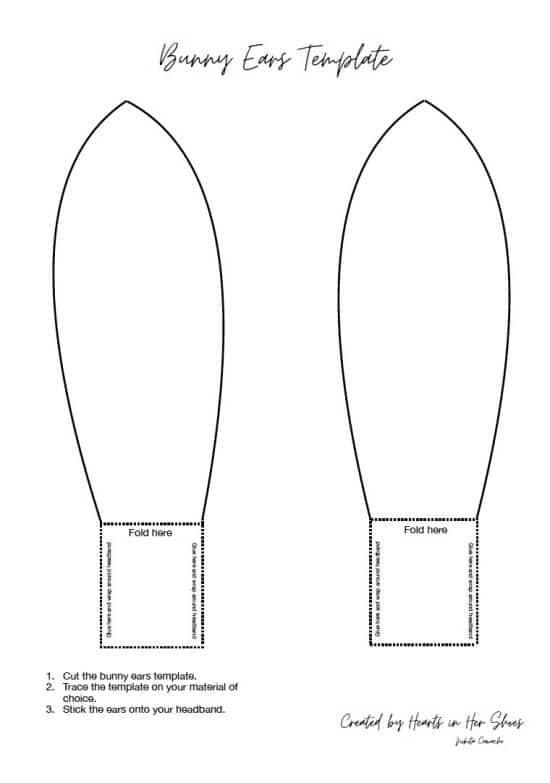 I created this template just for you to make your life easier. Easy to download and print. Click here for the link or click on the image above.
STEP 2: GET SUPPLIES
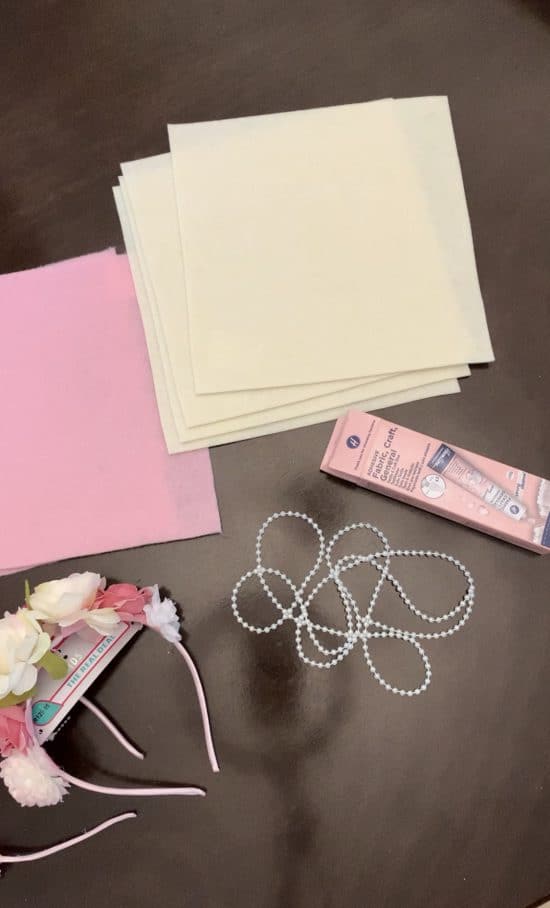 Under normal circumstances, I’d buy plain alice-bands/headbands and make felt flowers or create my own version of a floral headband. I bought these floral headbands at Dis-Chem for R129.99.
I bought six felt squares for R4.70 each and pipe cleaners (not pictured). Along with a metre of faux pearls for R7.90. The fabric glue I already had at home.
You can use cardboard or foam paper for the bunny ears.
STEP 2: CUT OUT THE EARS
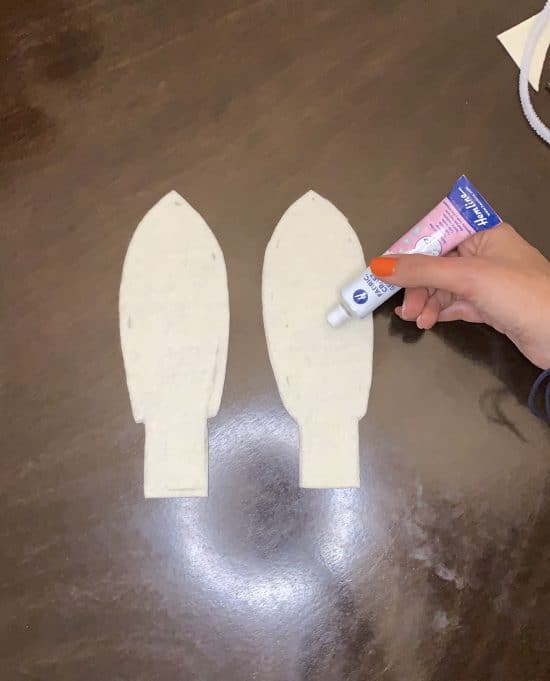 I cut out the template and traced the shape on the felt squares. I did leave half a centimeter border around the ear to make space in case I use too much glue. It gives me some leeway.
Each bunny ear has two layers of felt that I glued together with craft glue . Once it dried I put two pipe cleaners inside each bunny ear to help keep the bunny ears’ shape.
STEP 3: TRIM AND STICK

I wanted to add an extra colour pink to the inner of the bunny ears so I sketched these quickly and pasted them over the ears. I used a smaller sharper scissors to trim the edges a bit.
STEP 4: EARS TO HEADBAND
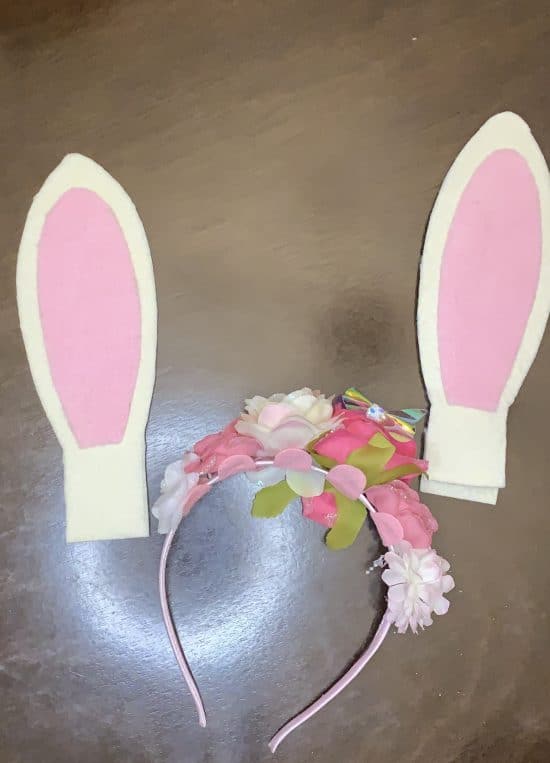
Next, I needed to glue bunny ears to the headband. I used contact adhesive for this. Be patient with the glue, it needs to dry.
STEP 5: HAVE FUN!

As a finishing touch to the easy Easter floral headband, I added faux pearls to the ears.
Enjoy the DIY and have fun!


Leave a Reply